
Are you looking to get more subscribers, build your email list and gain more long-term readers for your WordPress site? Popups are a great way to be able to achieve these goals.
While there are a variety of popups that can be used to grab your readers’ attention, this article will focus on gated content popups for WordPress and the best ways to use them with HollerBox.
What is a gated content popup?
Typically used by publications, these popups are implemented when you want to have a user complete a specific action before they are able to read an article or access other content on your website.
Before viewing protected contact, you may want readers to…
- Subscribe to your newsletter
- Upgrade to a premium plan
- Login to their account
- Make a purchase
- And more!
Now that you know what a gated content popup is, how is it put into action? Here are four different ways to utilize HollerBox to gain more subscribers.
1. Basic Content Gate
When it comes to gated popups for your WordPress site, this one is pretty straightforward. It is meant to collect the name and email of users and subscribe them to your content. It should appear for anyone who is not yet a subscriber on your site.
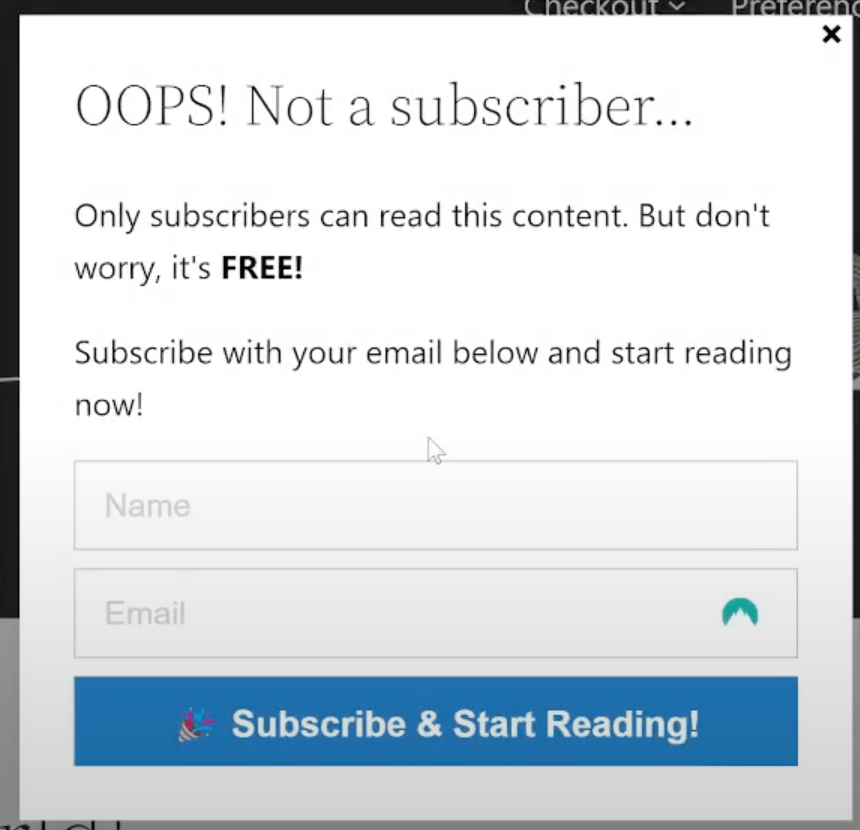
It can have a simple message such as “Oops, not a subscriber” that users cannot close until they fill out the desired information.
How to implement:
- Start off by creating a new popup with HollerBox or choosing one of the many templates to edit.
- Choose a title- it should highlight why the user is seeing this message such as “Oops! Not a subscriber”
- Next, fill out the body of the popup and choose what information you want to be collected. For our example, the body reads “Only subscribers can read this content. But don’t worry, it’s FREE! Subscribe with your email below and start reading now!” The user is then prompted to share both their name and email. The button reads “Subscribe & Start Reading!”
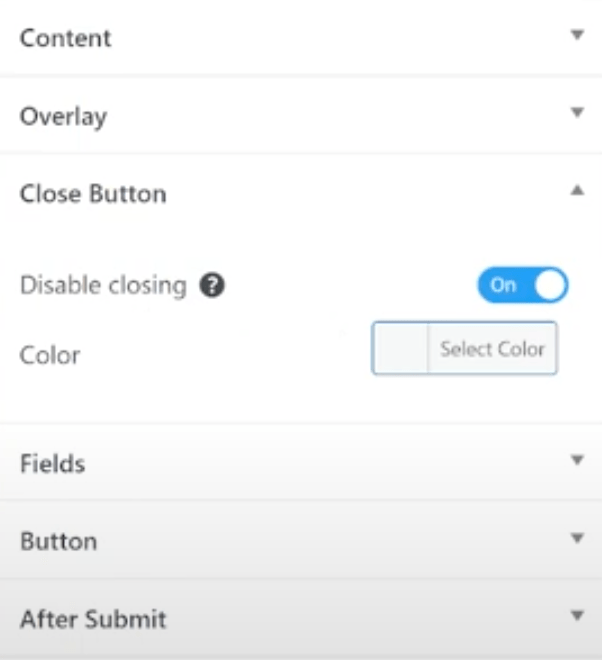
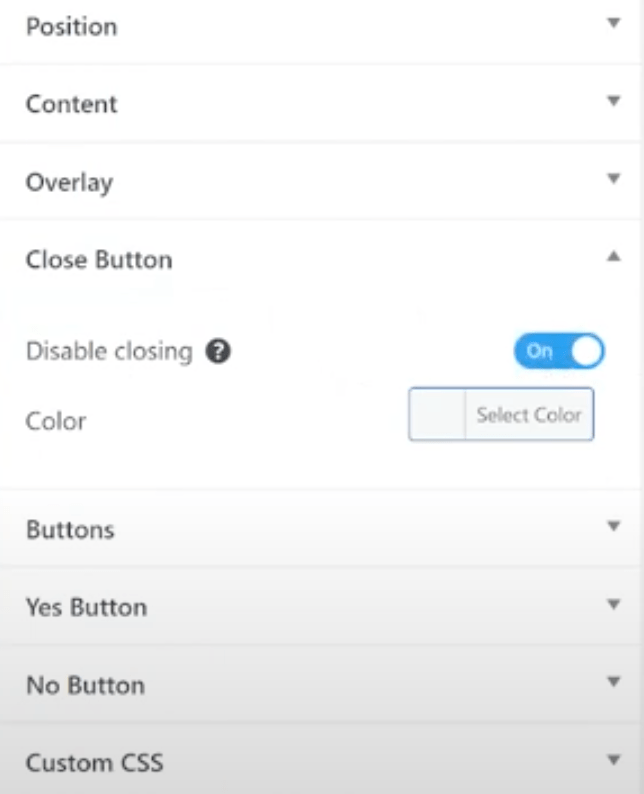
- To ensure that people have to fill out the form, you are then going to disable the close button. Click on the Close Button and then toggle the Disable Closing to on.
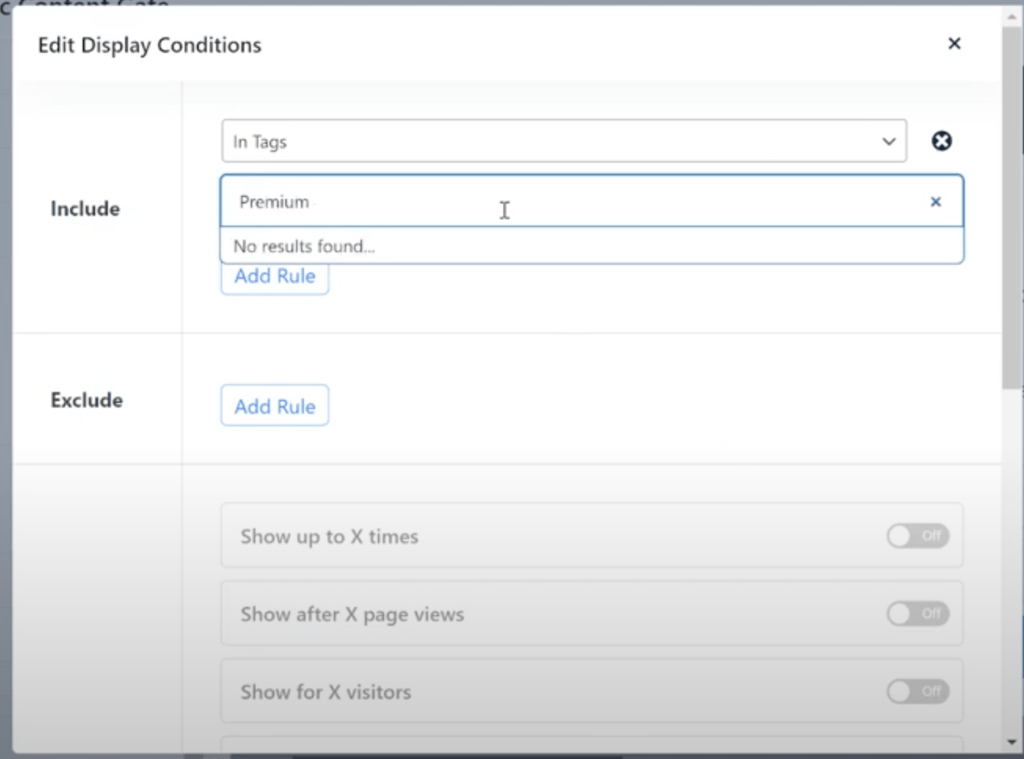
- Make sure that the display conditions are configured to ensure the popup will show where you want it. Let’s say for this example you have premium content you want to protect. Go to Display Conditions to tags and select the proper one in which the popup should be displayed, like Premium Content. Or, you can have your popup show on all posts.
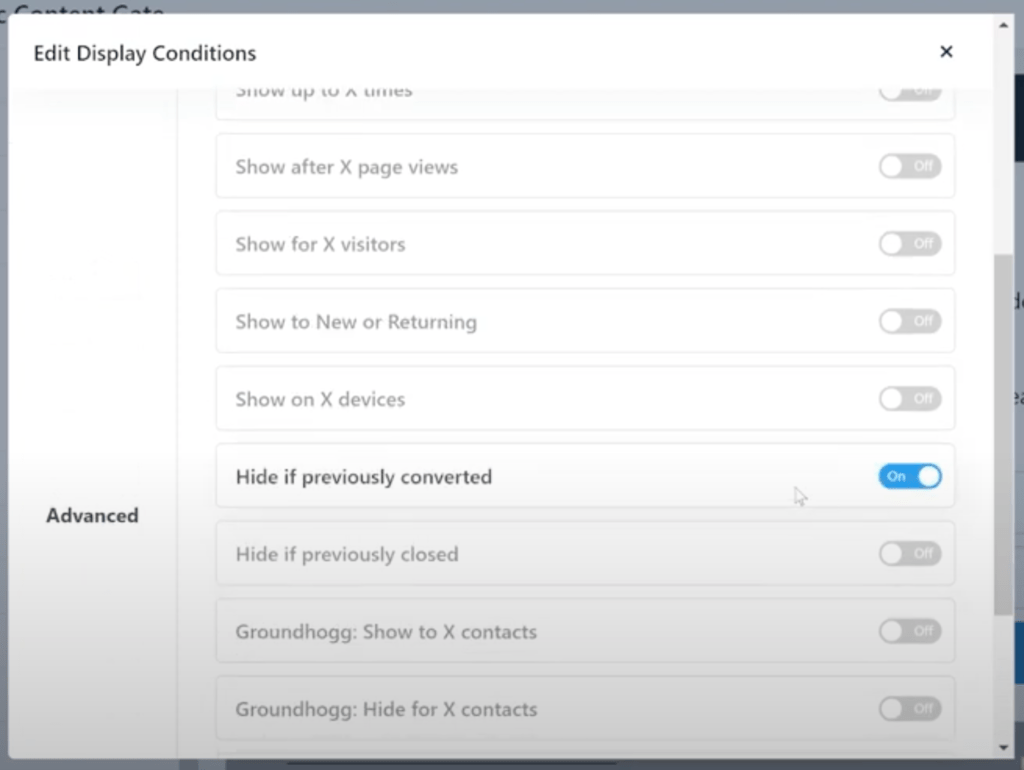
- Staying in the Display Conditions you also want to toggle on the Hide if previously converted button. This will ensure that people who have already filled out your form will not see this popup again.
- Go to Triggers to select when you want your popup to show. For this example, we are going to select On Page Load after zero seconds. This means a user will see it as soon as they land on the page.

- Hit that Publish button and your popup is ready to go!
2. Gated Content Popup for Logged-in/out Users
If you require your users to be logged in to your site before accessing your content, this is the popup that you will want to use. You can use this popup for your entire site or certain content.
For example, if users need to be subscribed to your site to read a specific column, this log-in process can ensure only those members can read the article.
How to implement:
- Start off by creating a new popup with HollerBox or choosing one of the many templates to edit. We are using a Yes & No Button template, there are many options for this template in HollerBox Pro.
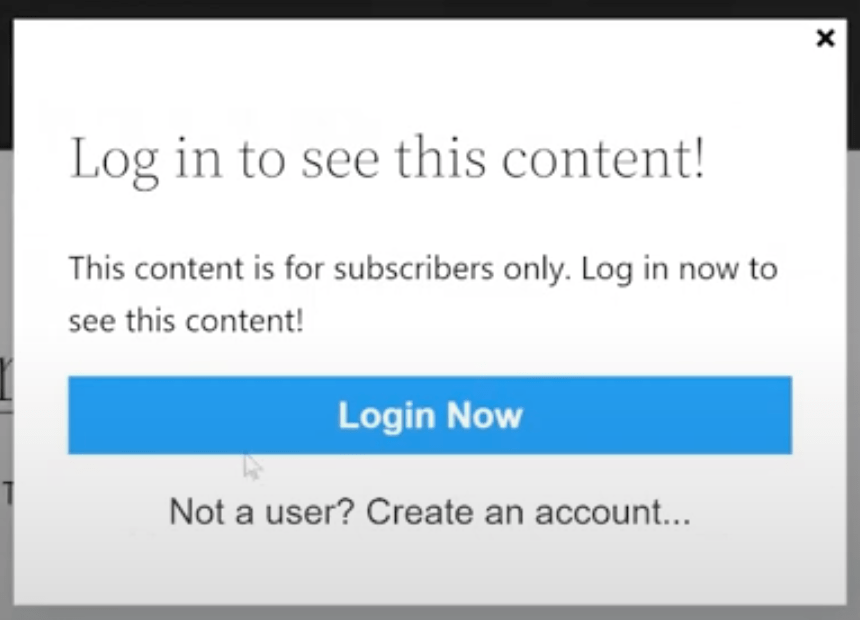
- Choose a title- it should highlight why the user is seeing this message such as “Log in to see this content!”
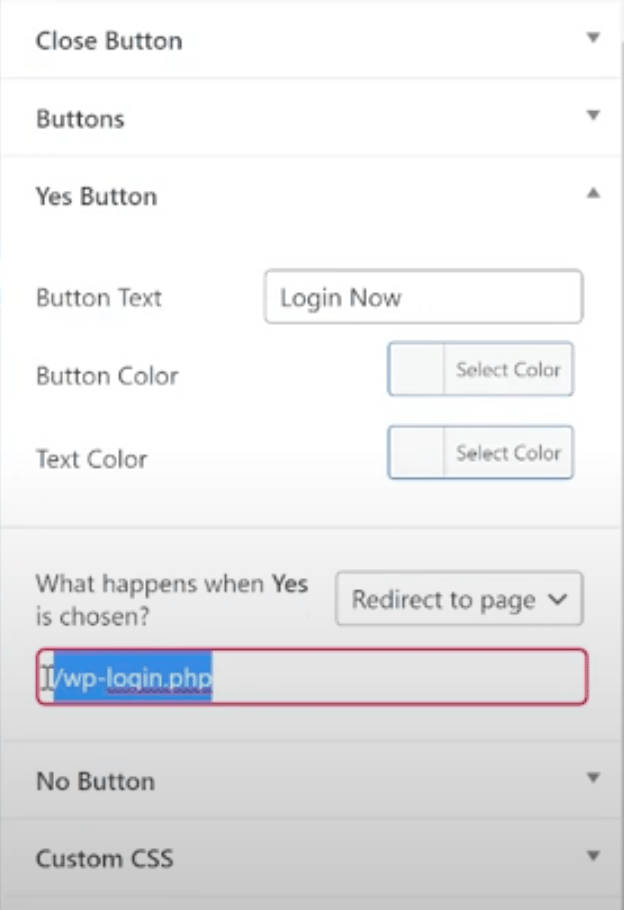
- Next, fill out the body of the popup. For our example, the body reads “This content is for subscribers only. Log in now to see this content!” The user is then prompted to either click the “Login Now” button or the “Not a user? Create an account” button.
- Next, you are going to choose where both buttons will be redirected once clicked. Click on the Yes Button settings and put the Login Page URL in the redirection box. Then, click on the No Button settings and put the Create Account Page URL in the redirection box.

- To ensure that people have to login or create an account before viewing the content, you are then going to disable the close button. Click on the Close Button and then toggle the Disable Closing to on.
- Make sure that the display conditions are configured to ensure the popup will show where you want it. Let’s say for this example you have premium content you want to protect. Go to Display Conditions to tags and select the proper one in which the popup should be displayed, like Premium Content. Or, you can have your popup show on all posts.

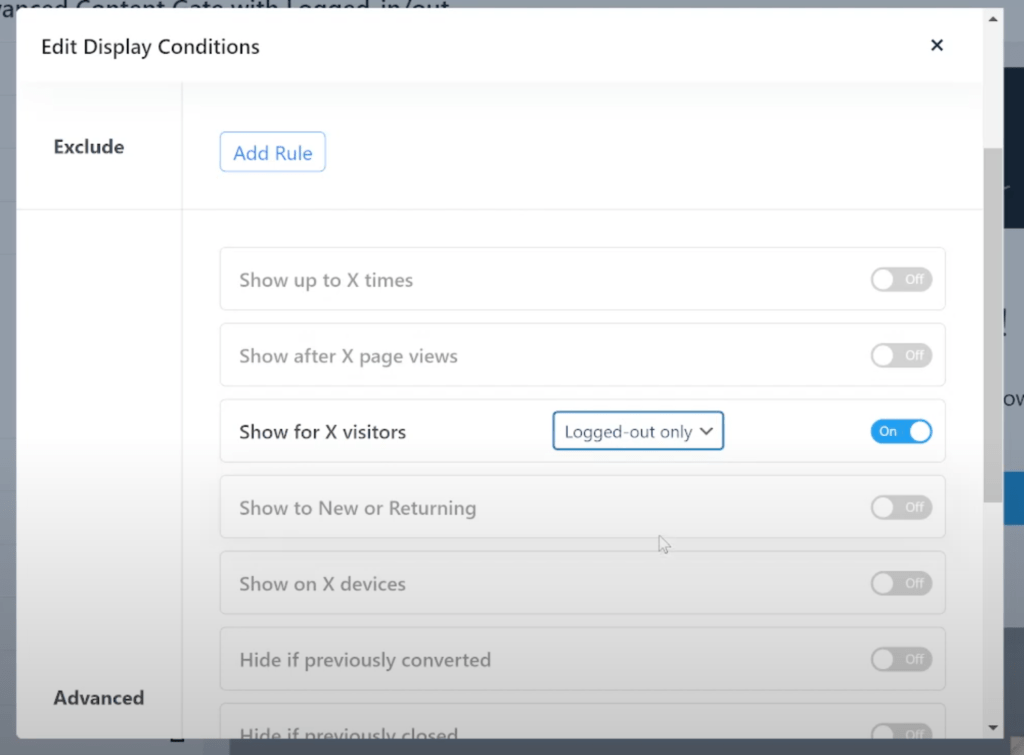
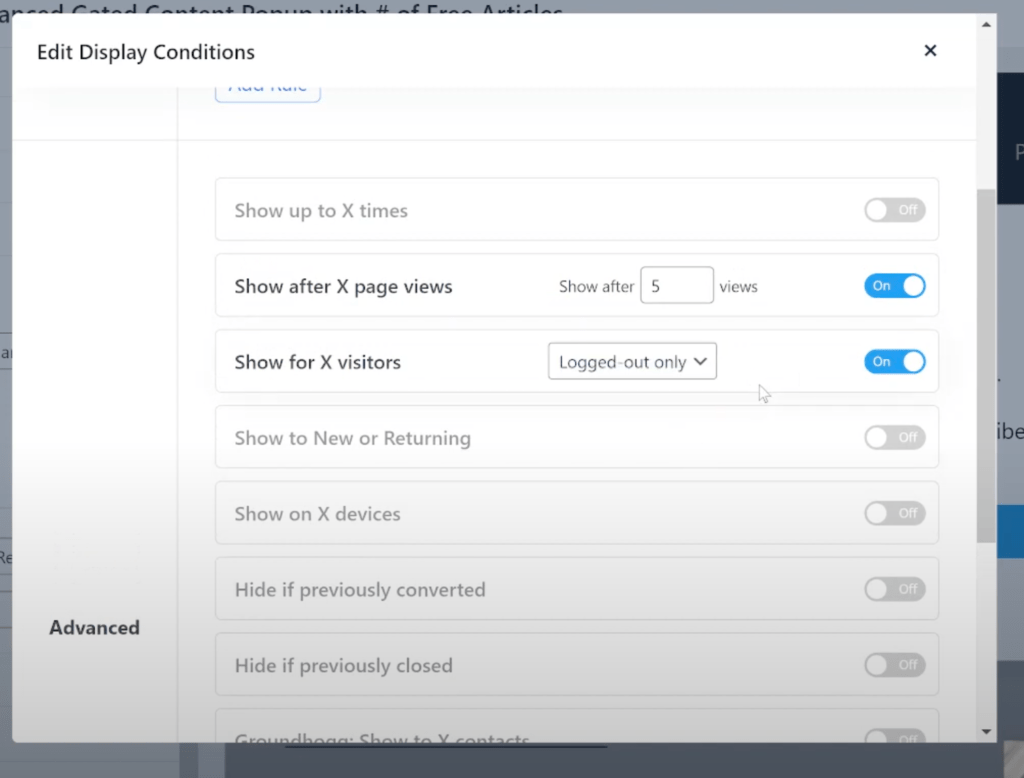
- Staying in the Display Conditions you also want to toggle on the Show for X Visitors button and set it to “logged-out-only”. This will ensure that people who are already logged in to your website will not see this popup.
- Go to Triggers to select when you want your popup to show. For this example, we are going to select On Page Load after zero seconds. This means a user will see it as soon as they land on the page.

- Hit that Publish button and your popup is ready to go!
3. Popup Gate using Groundhogg Display Conditions
If you’re looking for your readers to sign up for a paid subscription to read your content, this is one of the gated popups that you are going to want to use on your WordPress site.
You are able to use Groundhogg’s tags and conditions to completely customize who and who will not see this popup while visiting your site.
How to implement:
- Start off by creating a new popup with HollerBox or choosing one of the many templates to edit. We are using a Yes & No Button template, there are many options for this template in HollerBox Pro.
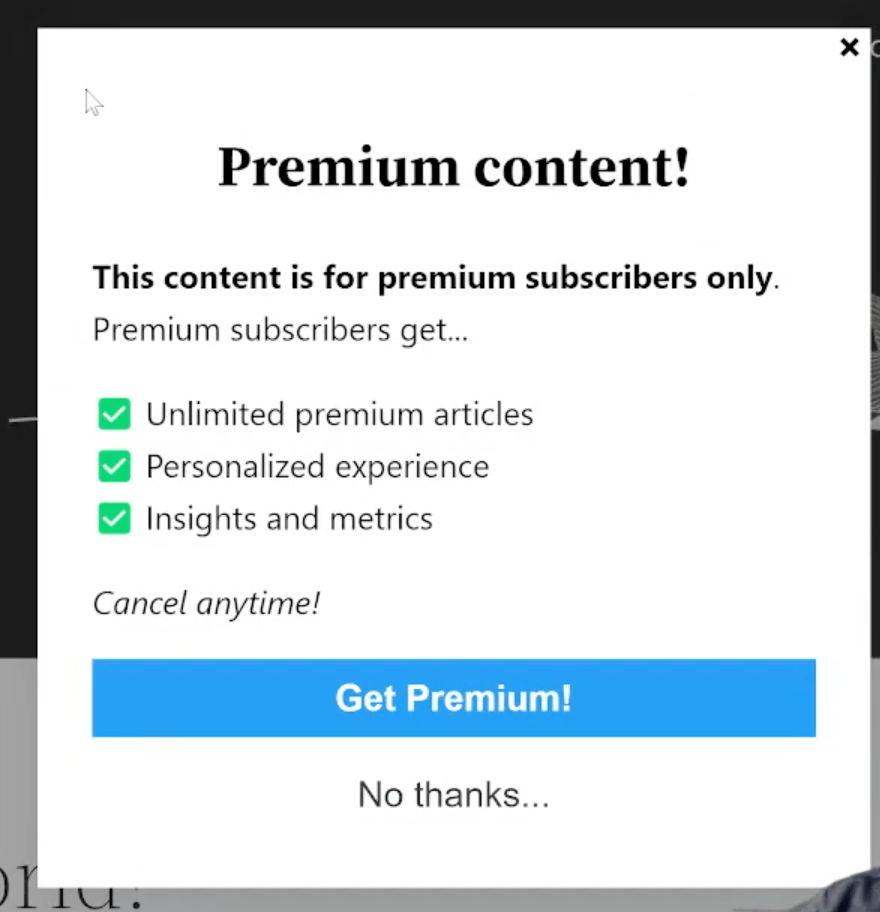
- Choose a title- it should highlight why the user is seeing this message such as “Premium Content!”
- Next, fill out the body of the popup. For our example, the body reads “This content is for premium subscribers only. Premium subscribers get, unlimited premium articles, personalized experience etc.” The user is then prompted to either click the “Get Premium!” button or the “No thanks…” button.
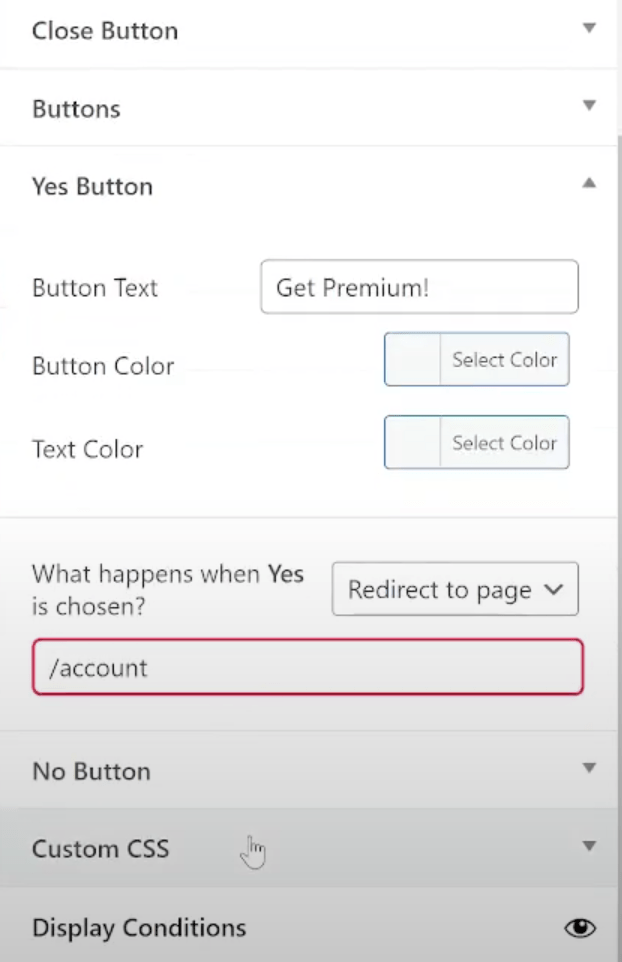
- Next, you are going to choose where both buttons will be redirected once clicked. Click on the Yes Button settings and put in the link to the pricing page, which could be run through WooCommerce, Easy Digital Downloads, Groundhogg etc.
- Then, click on the No Button settings and put a link that will send them away from premium content, such as a page of free articles, a homepage, etc.
- Make sure that the display conditions are configured to ensure the popup will show where you want it. Let’s say for this example you have premium content you want to protect. Go to Display Conditions to tags and select the proper one in which the popup should be displayed, like Premium Content. Or, you can have your popup show on all posts.

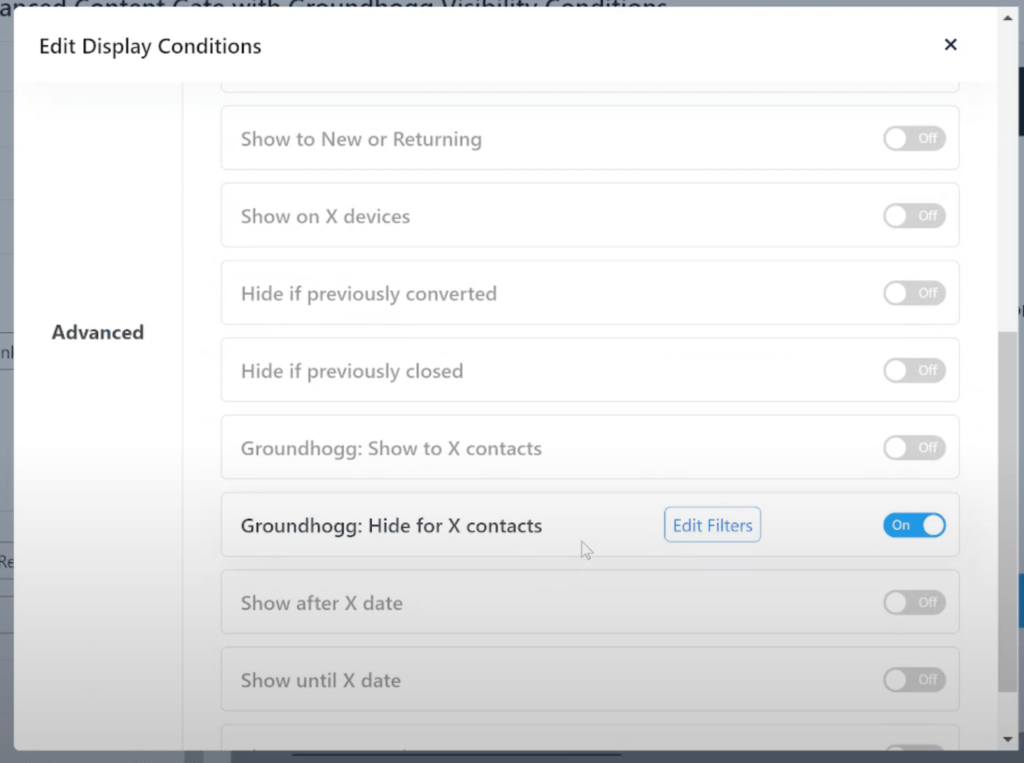
- Staying in the Display Conditions you also want to toggle on the Hide for X contacts button. This will allow you to choose who you don’t want to see this popup. Click Edit Filters and select the Groundhogg conditions that you don’t want to see the popup, such as “paywall” for those who have already paid or “birthday” if users get a free article on their birthday etc.
- Go to Triggers to select when you want your popup to show. For this example, we are going to select On Page Load after zero seconds. This means a user will see it as soon as they land on the page.

- Hit that Publish button and your popup is ready to go!
4. Delayed Popup Gate for # of Free Articles
These gated popups are something you see all the time in the publication industry. The main goal is to allow readers to have access to a certain number of articles before they have to subscribe.
You can use this if you want your readers to get hooked on your content and see the value you are offering before they have to pay.
How to implement:
- Start off by creating a new popup with HollerBox or choosing one of the many templates to edit. We are using a Yes & No Button template, there are many options for this template in HollerBox Pro.
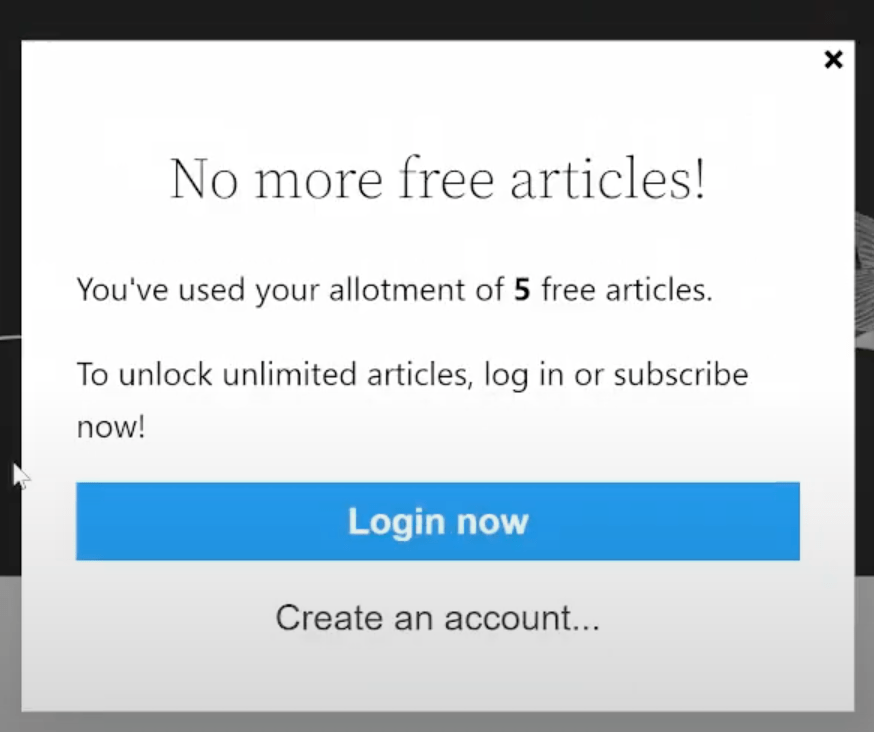
- Choose a title- it should highlight why the user is seeing this message such as “No more free articles!”
- Next, fill out the body of the popup. For our example, the body reads “You’ve used your allotment of 5 free articles. To unlock unlimited articles, log in or subscribe now!” The user is then prompted to either click the “Login Now” button or the “Create an account” button.
- Next, you are going to choose where both buttons will be redirected once clicked. Click on the Yes Button settings and put in the link to the login page. Click on the No Button settings and put in the link that will redirect users to the create an account page.
- Make sure that the display conditions are configured to ensure the popup will show where you want it. Let’s say for this example you have premium content you want to protect. Go to Display Conditions to tags and select the proper one in which the popup should be displayed, like Premium Content. Or, you can have your popup show on all posts.

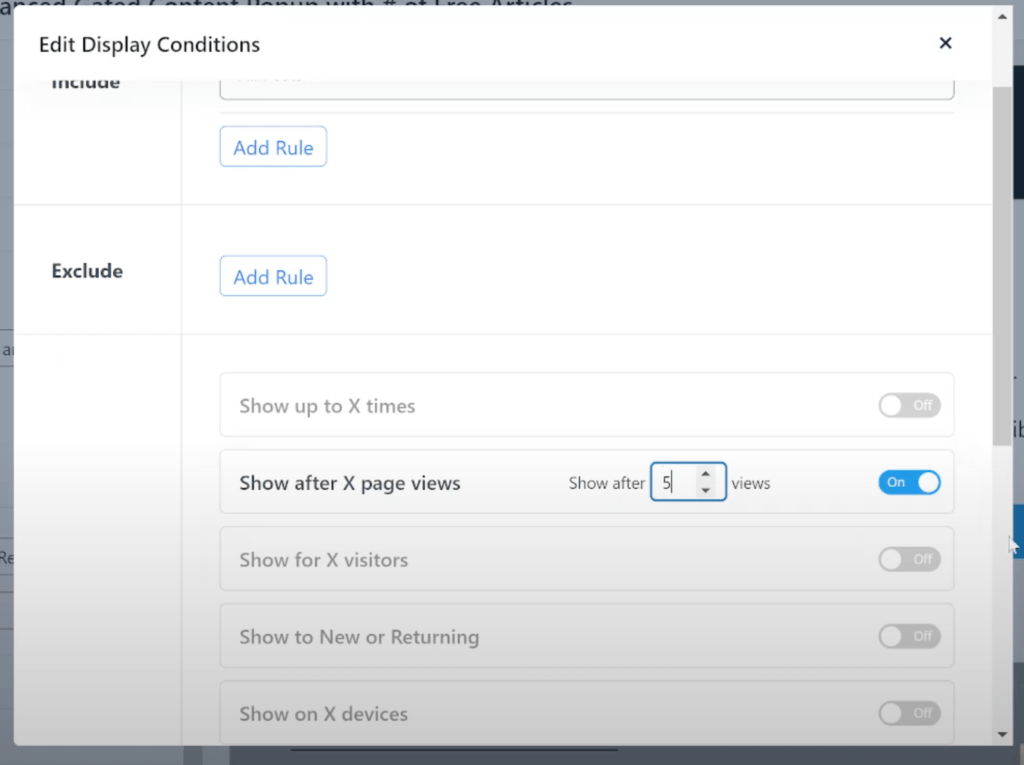
- Staying in the Display Conditions you also want to toggle on the Show After X Pageviews button. This will allow you to have the popup appear after a user has viewed your content a certain amount of time. Set the number to your desired outcome, in this example, we will do 5.
- In the Displayed Conditions, you also want to toggle on the Show For X Visitors and select “logged-out-only” This will ensure that readers who are already subscribed to your premium content will not see this popup.
- Go to Triggers to select when you want your popup to show. For this example, we are going to select On Page Load after zero seconds. This means a user will see it as soon as they land on the page.

- Hit that Publish button and your popup is ready to go!
Now that you know how to create some gated popups in WordPress…
You can get started with HollerBox and Groundhogg!
To get started with HollerBox you can view our features and pricing page!
To get started with Groundhogg, you can:
- Start a 14-day demo.
- Purchase a plan.
- Take the free quickstart course.
- Keep reading!
Have questions? Don’t hesitate to shoot us a message!
PS: This article was a video first! To view the full video on YouTube click here.