

The checkout page on your WooCommerce shop is where you get paid, so it’s important to get it just right.
The default configuration is pretty good, but you may need to customize it out of necessity, or to test for a higher conversion rate.
There are 2 ways to customize the page, with a plugin, or with custom code. We’ll go over both of those here.
Custom Checkout Template
Most customizations can be done using hooks and filters, but if you’d like to edit the markup on the checkout page, you can do that in a theme.
A word of warning: moving around the markup on the checkout page can cause problems with other plugins that use hooks and filters. I would not recommend removing any action hooks, or editing the markup aggressively.
According to the WooCommerce documentation, you can copy the checkout template to your theme by in a folder structured like this: woocommerce/checkout/form-checkout.php.
![]()
You can then customize form-checkout.php as desired, and it will load instead of the default template.
Customizing with CSS
CSS classes may change based on your theme or plugins, but the default classes are usually available.
You can customize these classes using custom CSS in a child theme, or the customizer. Here are the main high level tags, with classes and IDs you can use.
<body class="woocommerce-checkout">
<div class="woocommerce">
<form class="woocommerce-checkout"> <div id="customer_details" class="col2-set">
<div class="woocommerce-billing-fields">
<p class="form-row">
<div class="woocommerce-shipping-fields">
<p class="form-row">
<div class="woocommerce-additional-fields">
<div id="order_review" class="woocommerce-checkout-review-order"> <table class="woocommerce-checkout-review-order-table">
<div id="payment"> <ul class="wc_payment_methods payment_methods methods"> <div class="form-row place-order">
Example:
form.woocommerce-checkout input[type="text"] {
 border-radius: 3px;
 background-color: #ccc;
 color: #444;
}
To see all classes on the checkout page, use a browser inspector.
Checkout Action Hooks
Action hooks can be used to add or remove elements from the checkout page.
There are 9 action hooks on the checkout page:
- woocommerce_before_checkout_form
- woocommerce_checkout_before_customer_details
- woocommerce_checkout_billing
- woocommerce_checkout_shipping
- woocommerce_checkout_after_customer_details
- woocommerce_checkout_before_order_review
- woocommerce_checkout_order_review
- woocommerce_checkout_after_order_review
- woocommerce_after_checkout_form
There are also 7 additional hooks that may be available, depending on your layout:
- woocommerce_checkout_before_terms_and_conditions
- woocommerce_checkout_after_terms_and_conditions
- woocommerce_before_checkout_billing_form
- woocommerce_before_checkout_registration_form
- woocommerce_after_checkout_registration_form
- woocommerce_before_checkout_shipping_form
- woocommerce_after_checkout_shipping_form
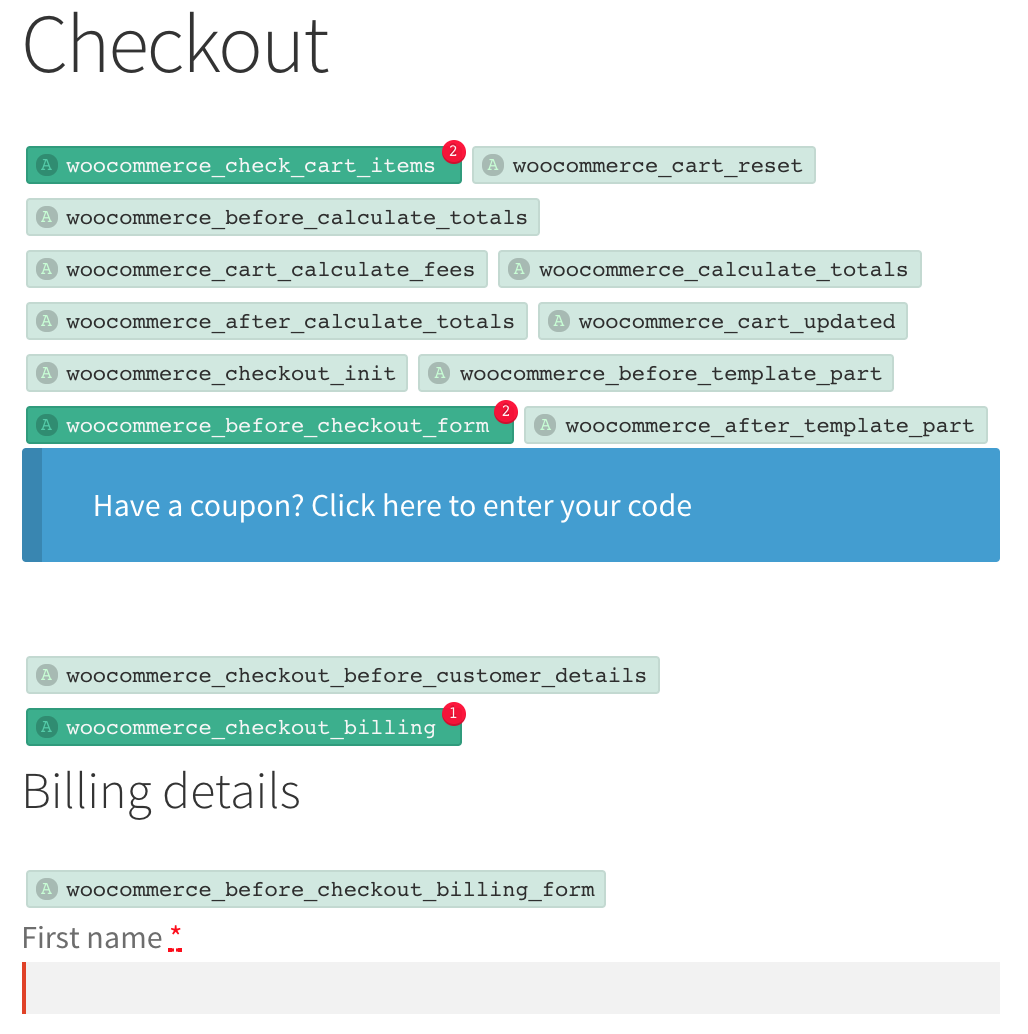
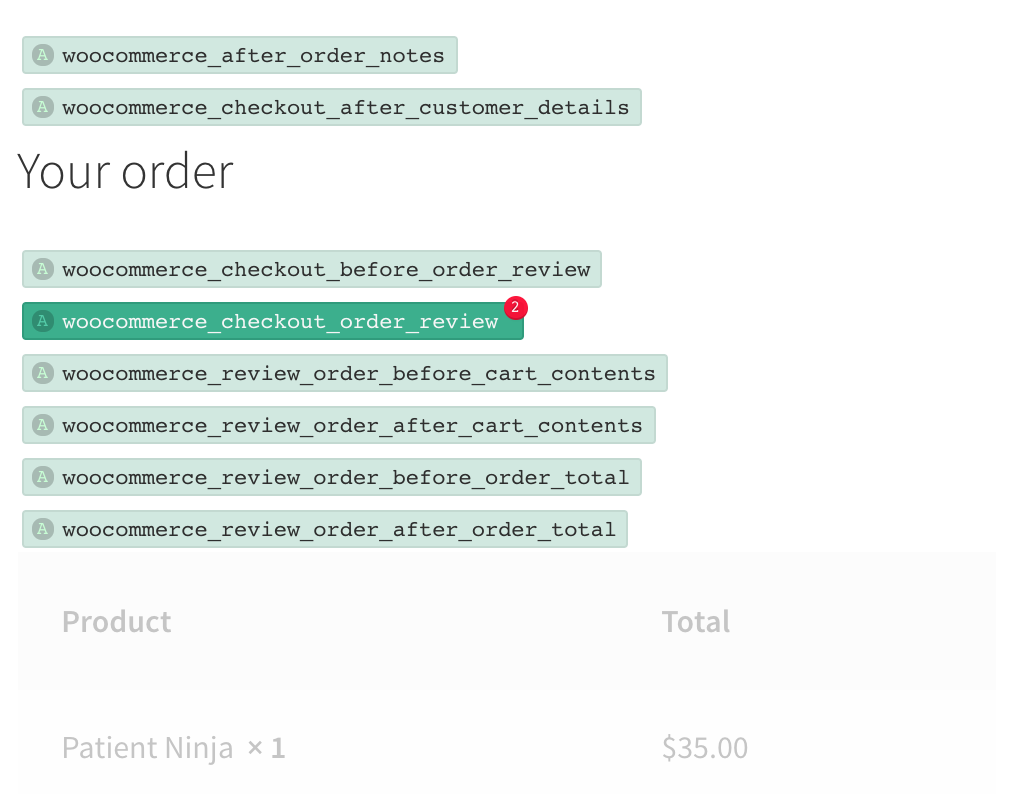
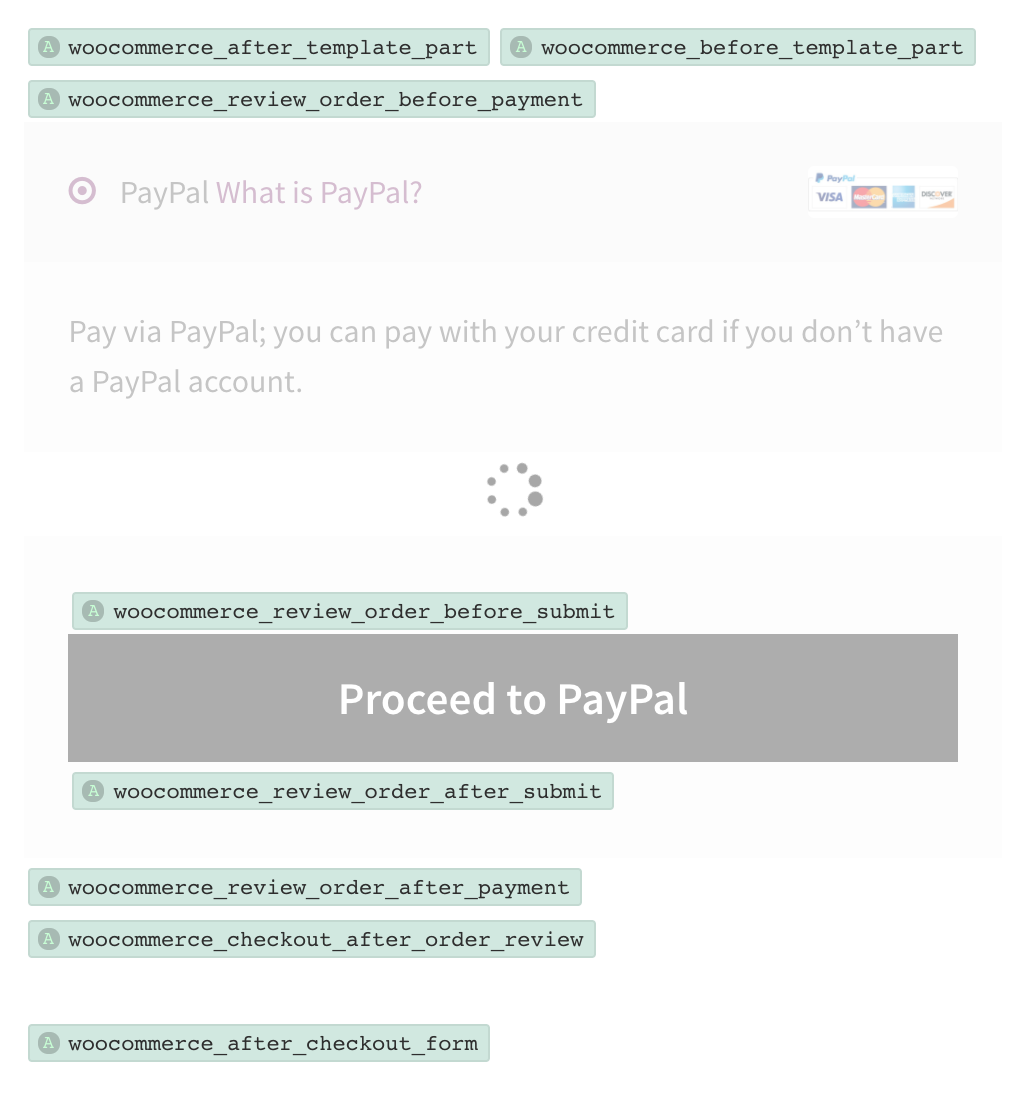
Checkout Hooks Visualized
It helps to get a visual idea of where the hooks are located.
Here’s the standard WooCommerce checkout page, using the Storefront theme.
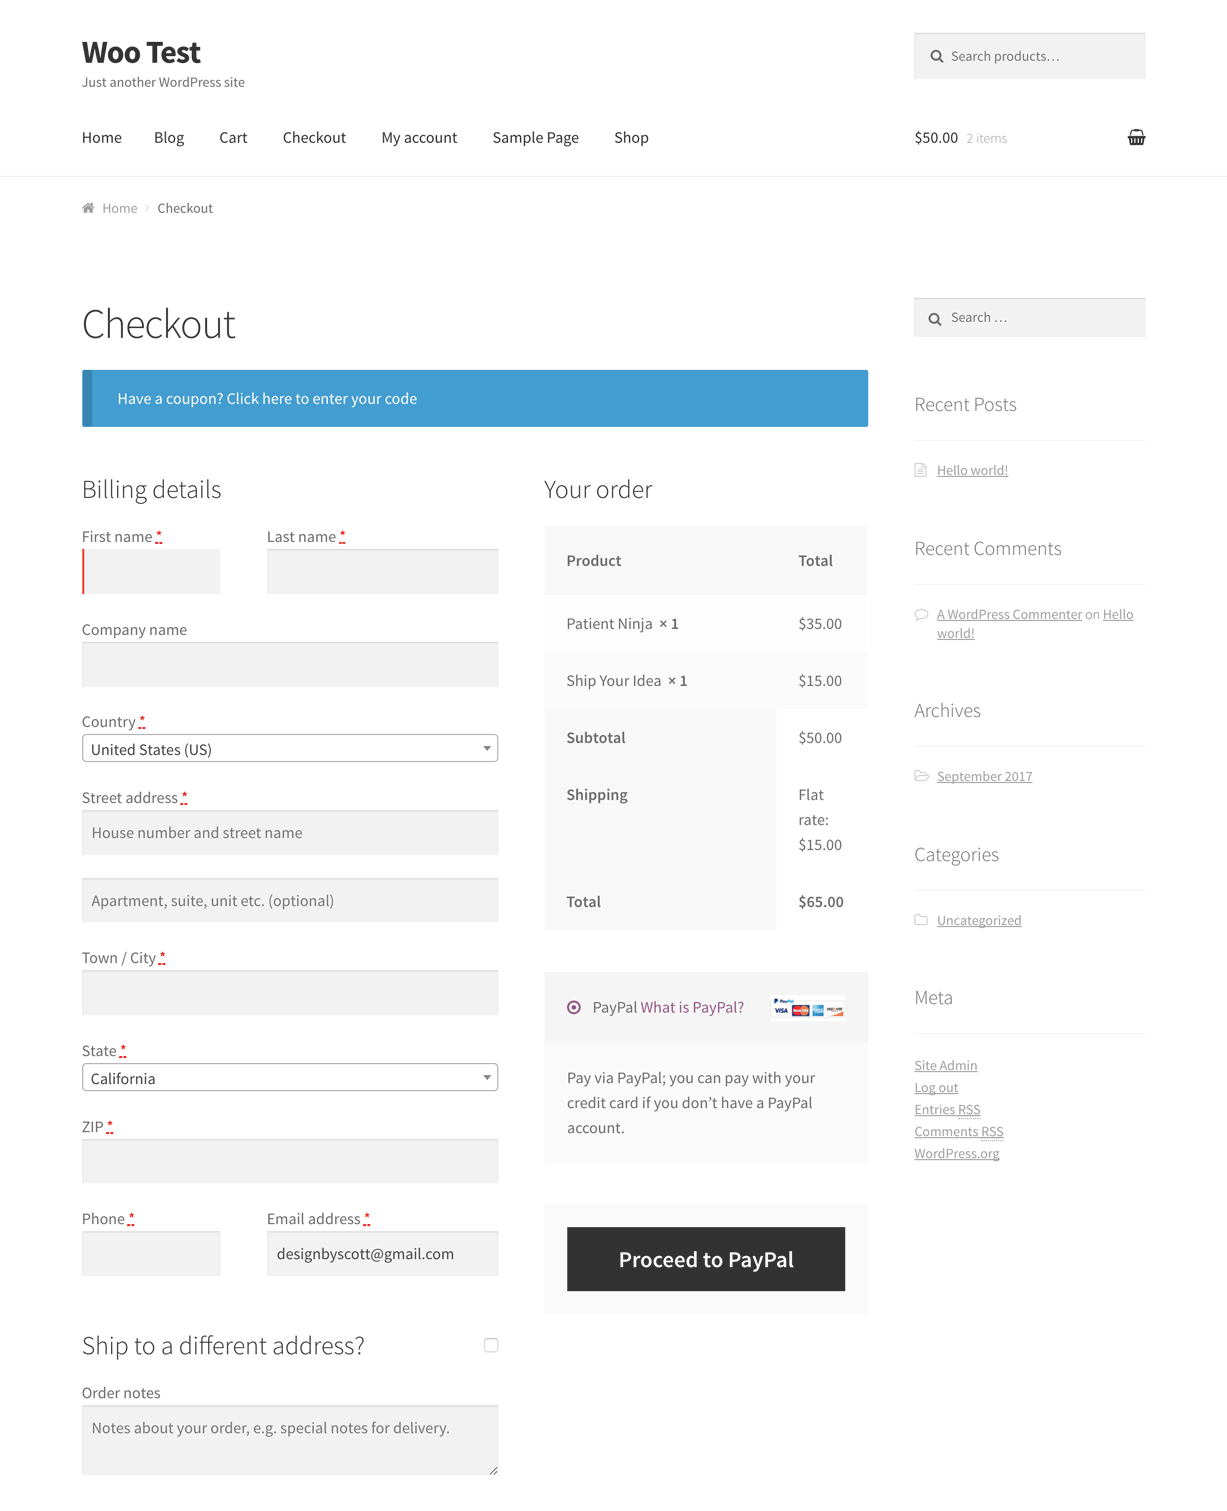
Here are many of the various hooks you can use, visually placed on the checkout page above.
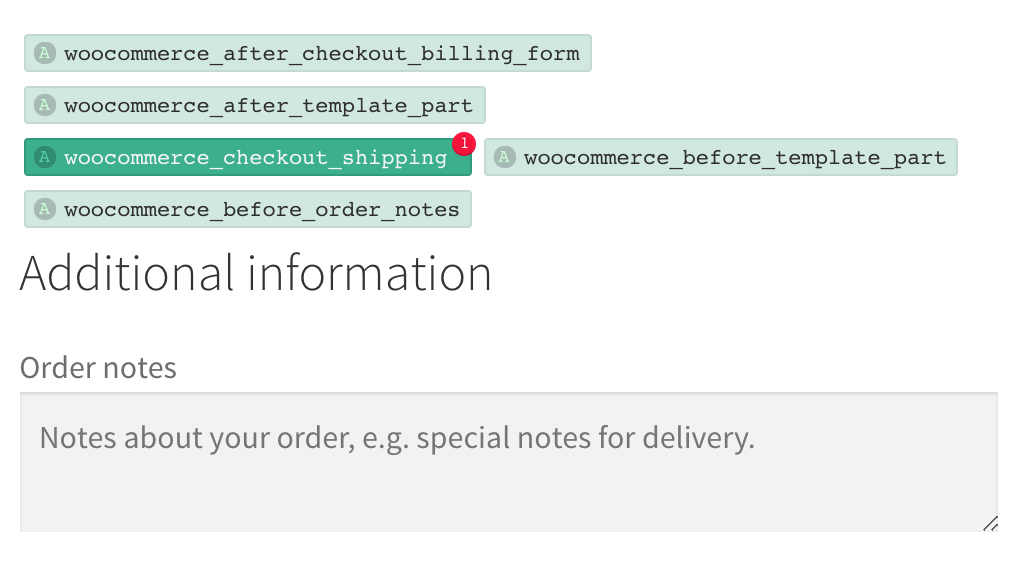

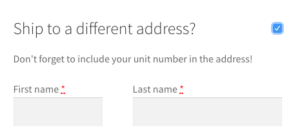
Action hooks are used to add markup to the page. For example, we can add a message to the customer about shipping details using the woocommerce_before_checkout_shipping_form hook.
add_action( 'woocommerce_before_checkout_shipping_form', function() {
	echo 'Don\'t forget to include your unit number in the address!';
});
That looks like this:
You can find documentation on all of the hooks here.
Moving, Adding, or Removing Checkout Fields
The easiest way to customize checkout fields is to use the Checkout Field Editor plugin.
This plugin provides a simple UI to move, edit, add, or remove any checkout fields. You can edit anything about the fields, including type, label, position, and more.
After installing and activating this plugin, you can visit WooCommerce => Checkout Fields to begin editing.
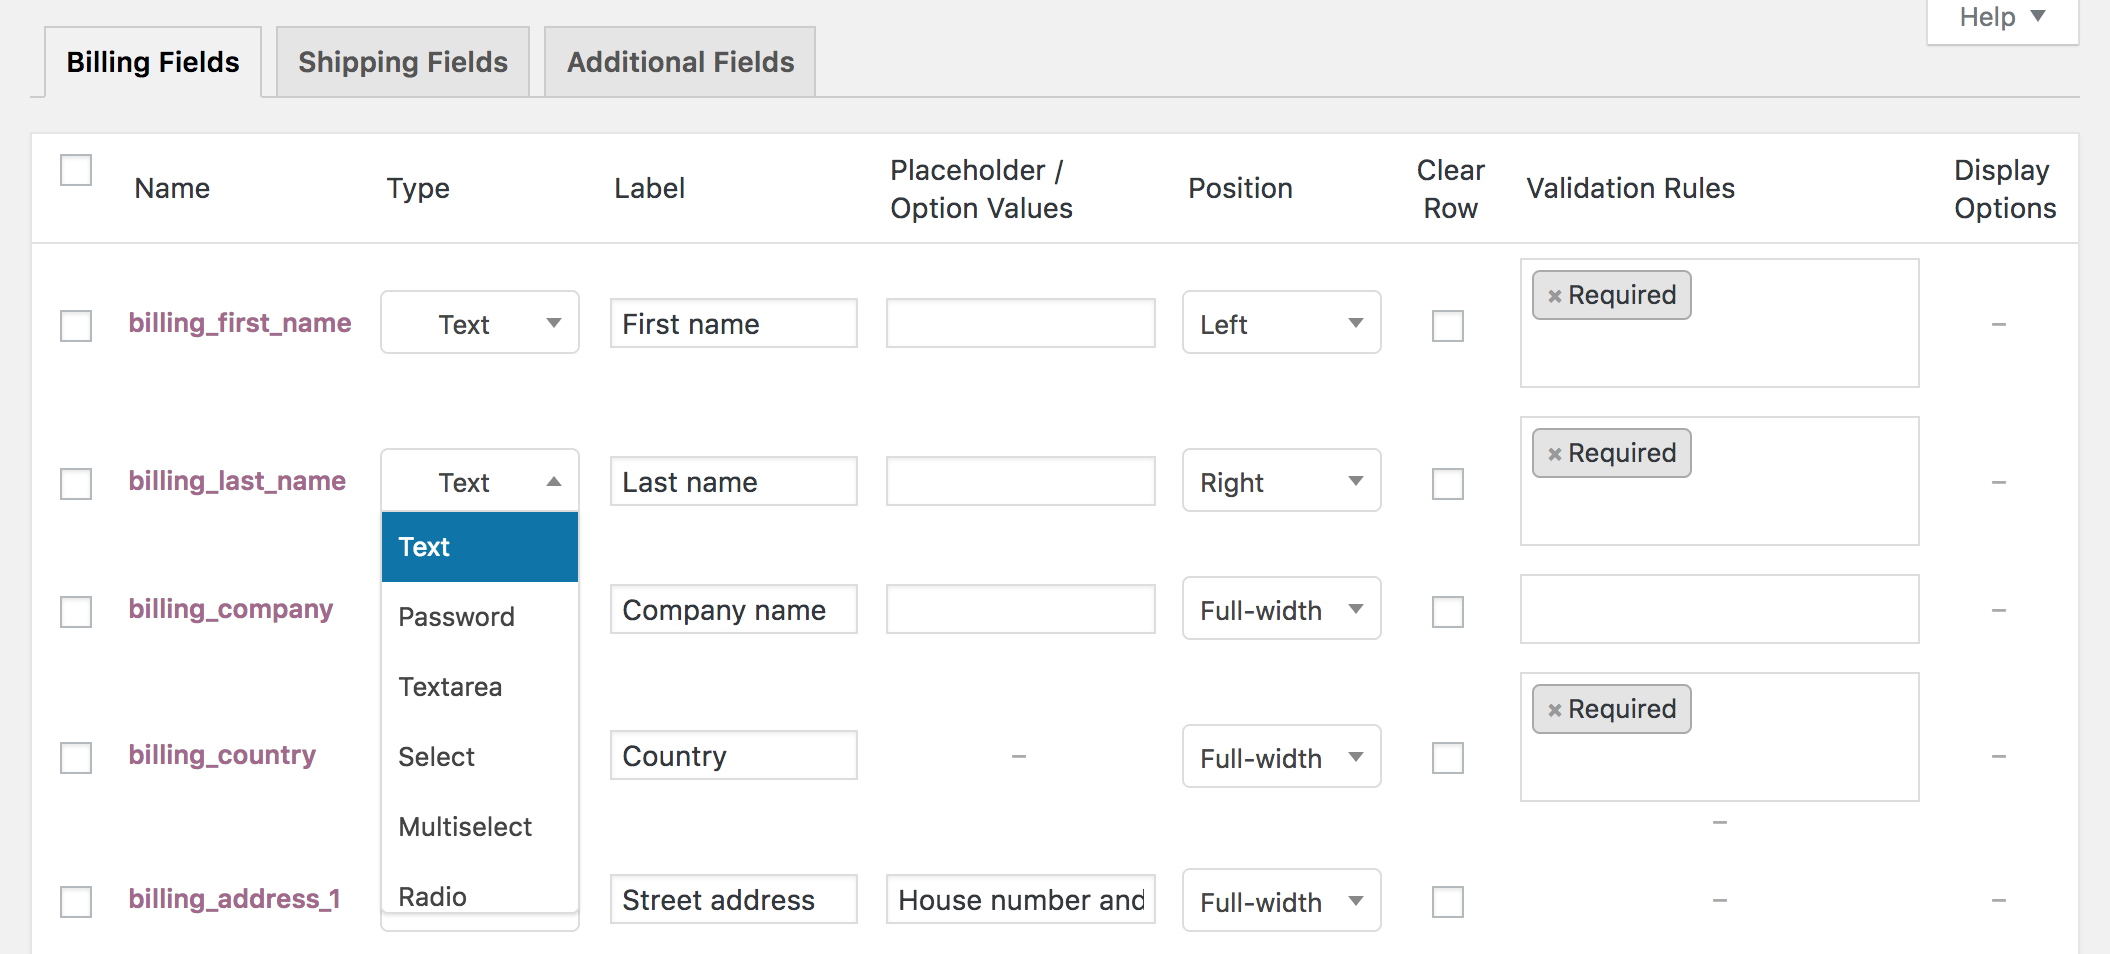
To edit a field, simply change the desired value and save. To add a field, click Add Field, and to remove, check the field and click Disable/Remove.
Custom Code
Custom code is a bit trickier, but if you only want to make a small edit without purchasing a plugin, here’s how you do it.
WooCommerce has several filters available to edit checkout fields, including woocommerce_checkout_fields, woocommerce_billing_fields, and woocommerce_shipping_fields.
You can use the woocommerce_checkout_fields filter to manipulate all the checkout fields.
Remove the billing phone number field
// Hook in
add_filter( 'woocommerce_checkout_fields' , 'my_override_checkout_fields' );
// Our hooked in function - $fields is passed via the filter!
function my_override_checkout_fields( $fields ) {
  unset($fields['billing']['billing_phone']); return $fields; }
Add Shipping Phone Number Field
// Hook in
add_filter( 'woocommerce_checkout_fields' , 'custom_override_checkout_fields' );

// Our hooked in function - $fields is passed via the filter!
function custom_override_checkout_fields( $fields ) {
     $fields['shipping']['shipping_phone'] = array(
        'label'   => __('Phone', 'woocommerce'),
    'placeholder'=>  _x('Phone', 'placeholder', 'woocommerce'),
    'required' => false,
    'class'    => array('form-row-wide'),
    'clear'    => true
     );

     return $fields;
}

/**
 * Display field value on the order edit page
 */

add_action( 'woocommerce_admin_order_data_after_shipping_address', 'my_custom_checkout_field_display_admin_order_meta', 10, 1 );

function my_custom_checkout_field_display_admin_order_meta($order){
    global $post_id;
    $order = new WC_Order( $post_id );
    echo '<p><strong>'.__('Field Value').':</strong> ' . get_post_meta($order->get_id(), '_shipping_field_value', true ) . '</p>';
}
To edit a field, you can access the field attributes. For example, let’s change the placeholder for Zip to Postal Code.
Change Field Placeholder
add_filter( 'woocommerce_checkout_fields' , 'my_override_checkout_fields' );

// Our hooked in function - $fields is passed via the filter!
function my_override_checkout_fields( $fields ) {
     $fields['billing']['billing_postcode']['placeholder'] = 'Postal Code';
     return $fields;
}
For more examples, view the WooCommerce documentation here.
WooCommerce Checkout Extensions
There are a variety of extensions available to customize the checkout page, here are just a few.
This extension allows you to put a checkout form on the same page as your product, making it a one-step payment process.
The normal WooCommerce flow is: go to the single product, click add to cart, go to the cart page, then go to checkout. One page checkout allows you to change that to: go to the product page => checkout.
This extension allows you to add paid services or products at checkout. Examples would be, gift wrapping, priority boarding, setup services, and more.
This extension allows customers to use their social accounts to login at checkout, so they don’t have to create a new account manually.
It integrates with most major social networks, such as Facebook, Twitter, Google, and more.
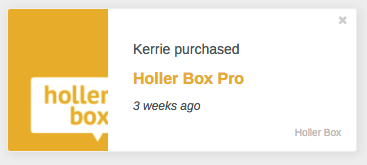
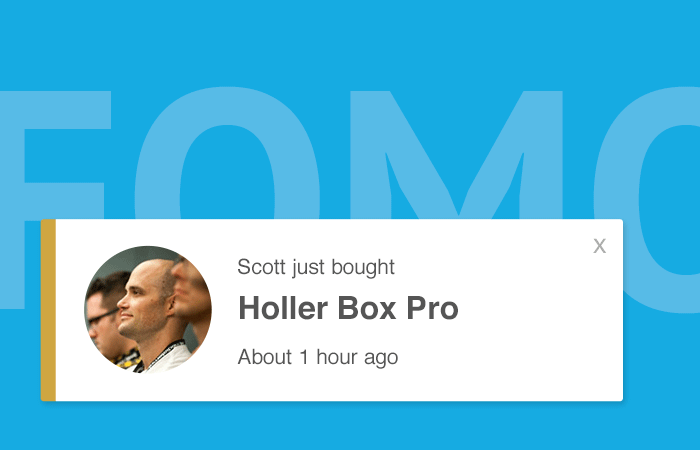
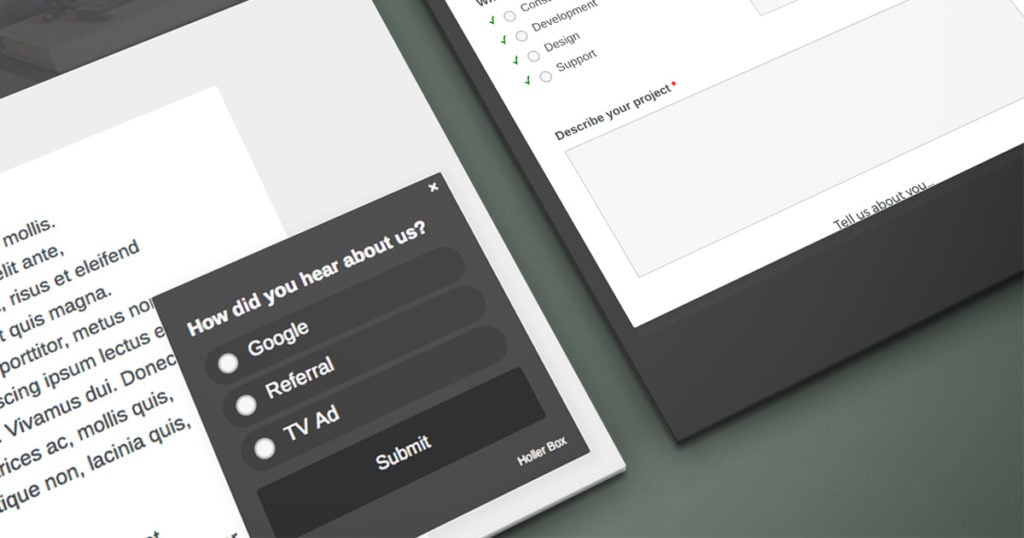
This is not specific to checkout, but it can help purchase conversions. Show sale notification popups on your WooCommerce site with the Holler Box FOMO plugin.
Conclusion
Editing the WooCommerce checkout page is something you should do with care.
Sometimes your reason is a mandatory client request, other times you may have your own intuition as to what will work better. If you are making changes that aren’t critical to your business, just make sure to keep an eye on your conversions using a Google Analytics conversion funnel, or an A/B testing tool.
The last thing you want to do is make a change that will hurt your conversions instead of help them.


![WooCommerce Statistics [Infographic]](https://hollerwp.com/wp-content/uploads/2017/07/woo-stats-1200-1024x538.png)
Hi: I have a problem. My store is in Bangladesh. I change some of the placeholders with the plugin Theme Customization from woocomerce, but when the page loads, this changes hold for a second and then return to the default values, and I have no idea why.
Other changes I did, load normal like a new field for telephones.
Do you have any idea why is this happening?
Hi! I’m looking for someone to customize our checkout page. I have already another website that I want to use as a “model”. Does your company do this customizations? How would it be priced? If you do, we can follow up on email. Thanks
Hi i can customize your checkout page .
For further details send me an email . Thanks
Let me know if you still need help
You can see how our payment page does it.https://www.newbecca.com
Super useful for removing those ‘boring’ fields! Thank you so much!
Worked perfectly.
I am really having a hard time getting this to work. I would simply like to remove the field for the telephone number, which I have done on the editing form, but my changes are not showing up on my site.
it will show on the store site front. i.e woocommerce store front page- register-> after providing vital information it will work. Because you might have confused the user page with the wordpress site. WordPress site and woocommerce store site is two very different thing./
i want to move check zipcode box from product category to car (process to checkout)
plz help me out …………
Very Very Very useful, especially the screen shots. Thanks!
Hey there, Great Post!! very useful
my question is how can you add a field in the checkout to put instagram username, im selling instagram services and this is the most important aspect of my checkout. im kind lost.. =] is there a way to write css that will do that for me?
Thanks Scott. Its really helpful for those who wants to customize checkout page and also useful for making more mobile responsive. Keep it up.
omg this helped so much..thanks for this..i was able to custom input delivery date and special message fiields on the shipping page for the flower shop client of mine ..sweet no plugins needed
Thanks for the great guide, Scott! Always love the visual hook maps, really help to memorize the hooks, and I usually save them.
It’s really useful, when you know how to code, at least a basic WordPress stuff. But what if you are an entrepreneur, who wants to sell products and services, not dig into the code?
From my own experience: sometimes copying a snippet and pasting it to the functions.php could lead to the “white screen”, cause you don’t know how PHP works, but want to tweak something 😀
Thanks God, now there are a few great plugins that let you customize your WooCommerce checkout page without coding skills. Actually, in the past I struggled with that in my own WooCommerce store, but haven’t found any available solutions. So, I had to build a custom checkout for myself, and then transformed it into an easy-to-use plugin to save the time for guys like me.
Thanks again!
Appreciable tutorial for beginners. Excellent resources for new learners. Thank you very much.
Excellent, exactly what I was looking for. Thx.